On your iOS® device follow these steps:
Alternatively, to manage your subscription you can review your subscriptions associated with your Apple® Account by clicking here.
The fastest and easiest way to manage your subscriptions is through your secure online portal. You can disable auto-renewal at any time using our simple one-click cancellation process — no need to contact support.
This will stop your subscription from renewing at the end of your current billing period. Your services will remain fully active until that time, and no further charges will be made.
To get started, choose the payment method you used at sign-up and follow the step-by-step instructions below.
On your iOS® device follow these steps:
Alternatively, to manage your subscription you can review your subscriptions associated with your Apple® Account by clicking here.
To manage your subscription you can review your subscriptions associated with your Google Account by clicking here.
If you wish to cancel a subscription with us, you can do so by clicking here to access your account and navigating to the services menu.
Please see below for an overview of the simple steps.
Login to your account on our website.
On your dashboard click the 'My Subscriptions'
Click 'Cancel Subscription' on your subscription.
As a security measure, we require you to verify your identity as the account holder before we make any changes to your billing preferences. To facilitate this process, we dispatch a verification code to the email address associated with your account.
If you wish to cancel a subscription with us, you can do so by clicking here to access your account and navigating to the services menu.
Please see below for an overview of the simple steps.
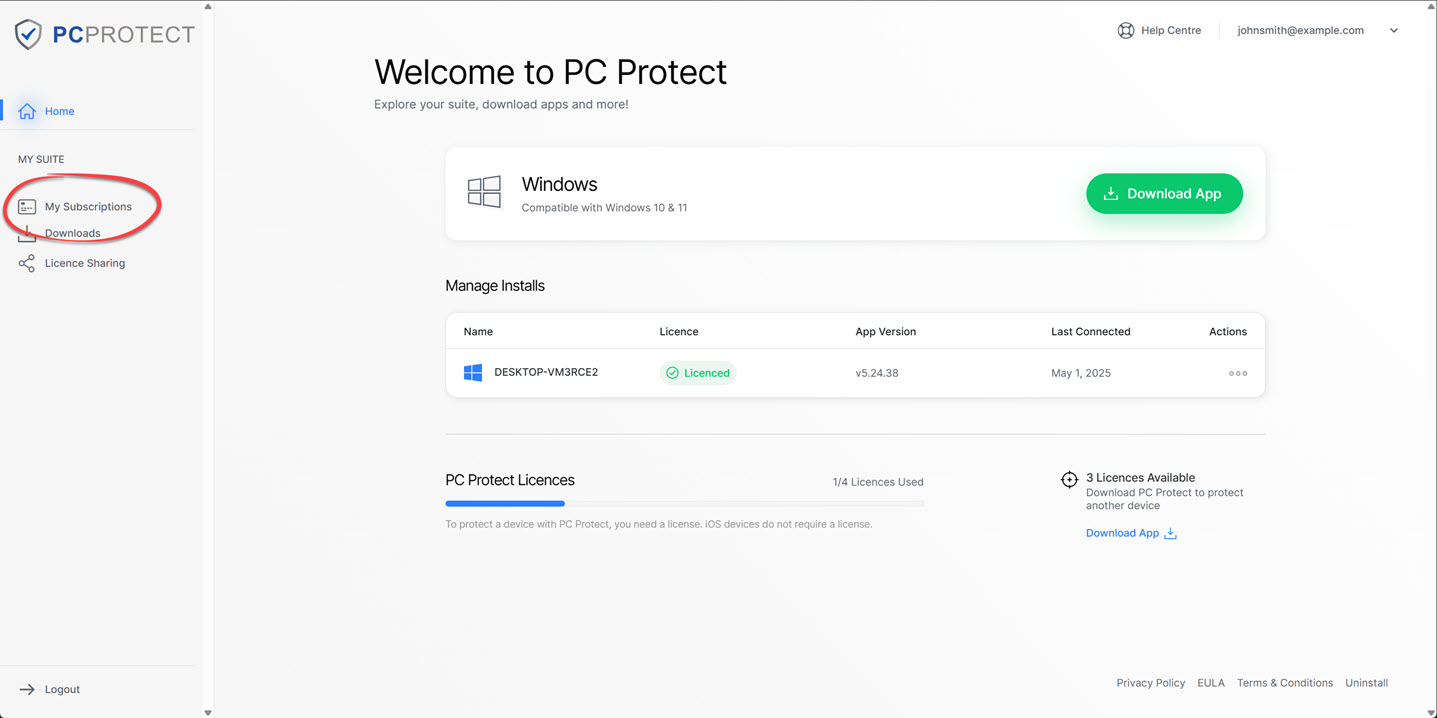
Login to your account on our website.
On your dashboard click the 'My Subscriptions'
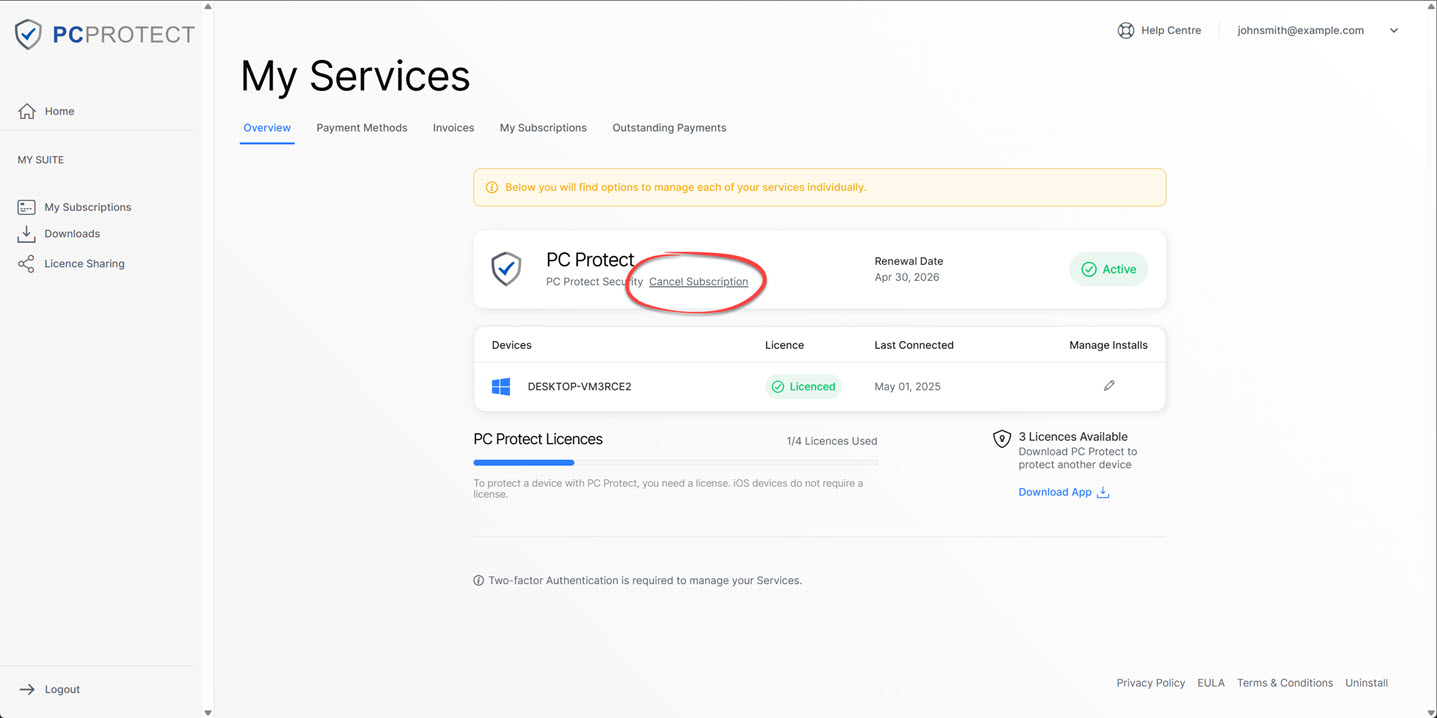
Click 'Cancel Subscription' on your subscription.
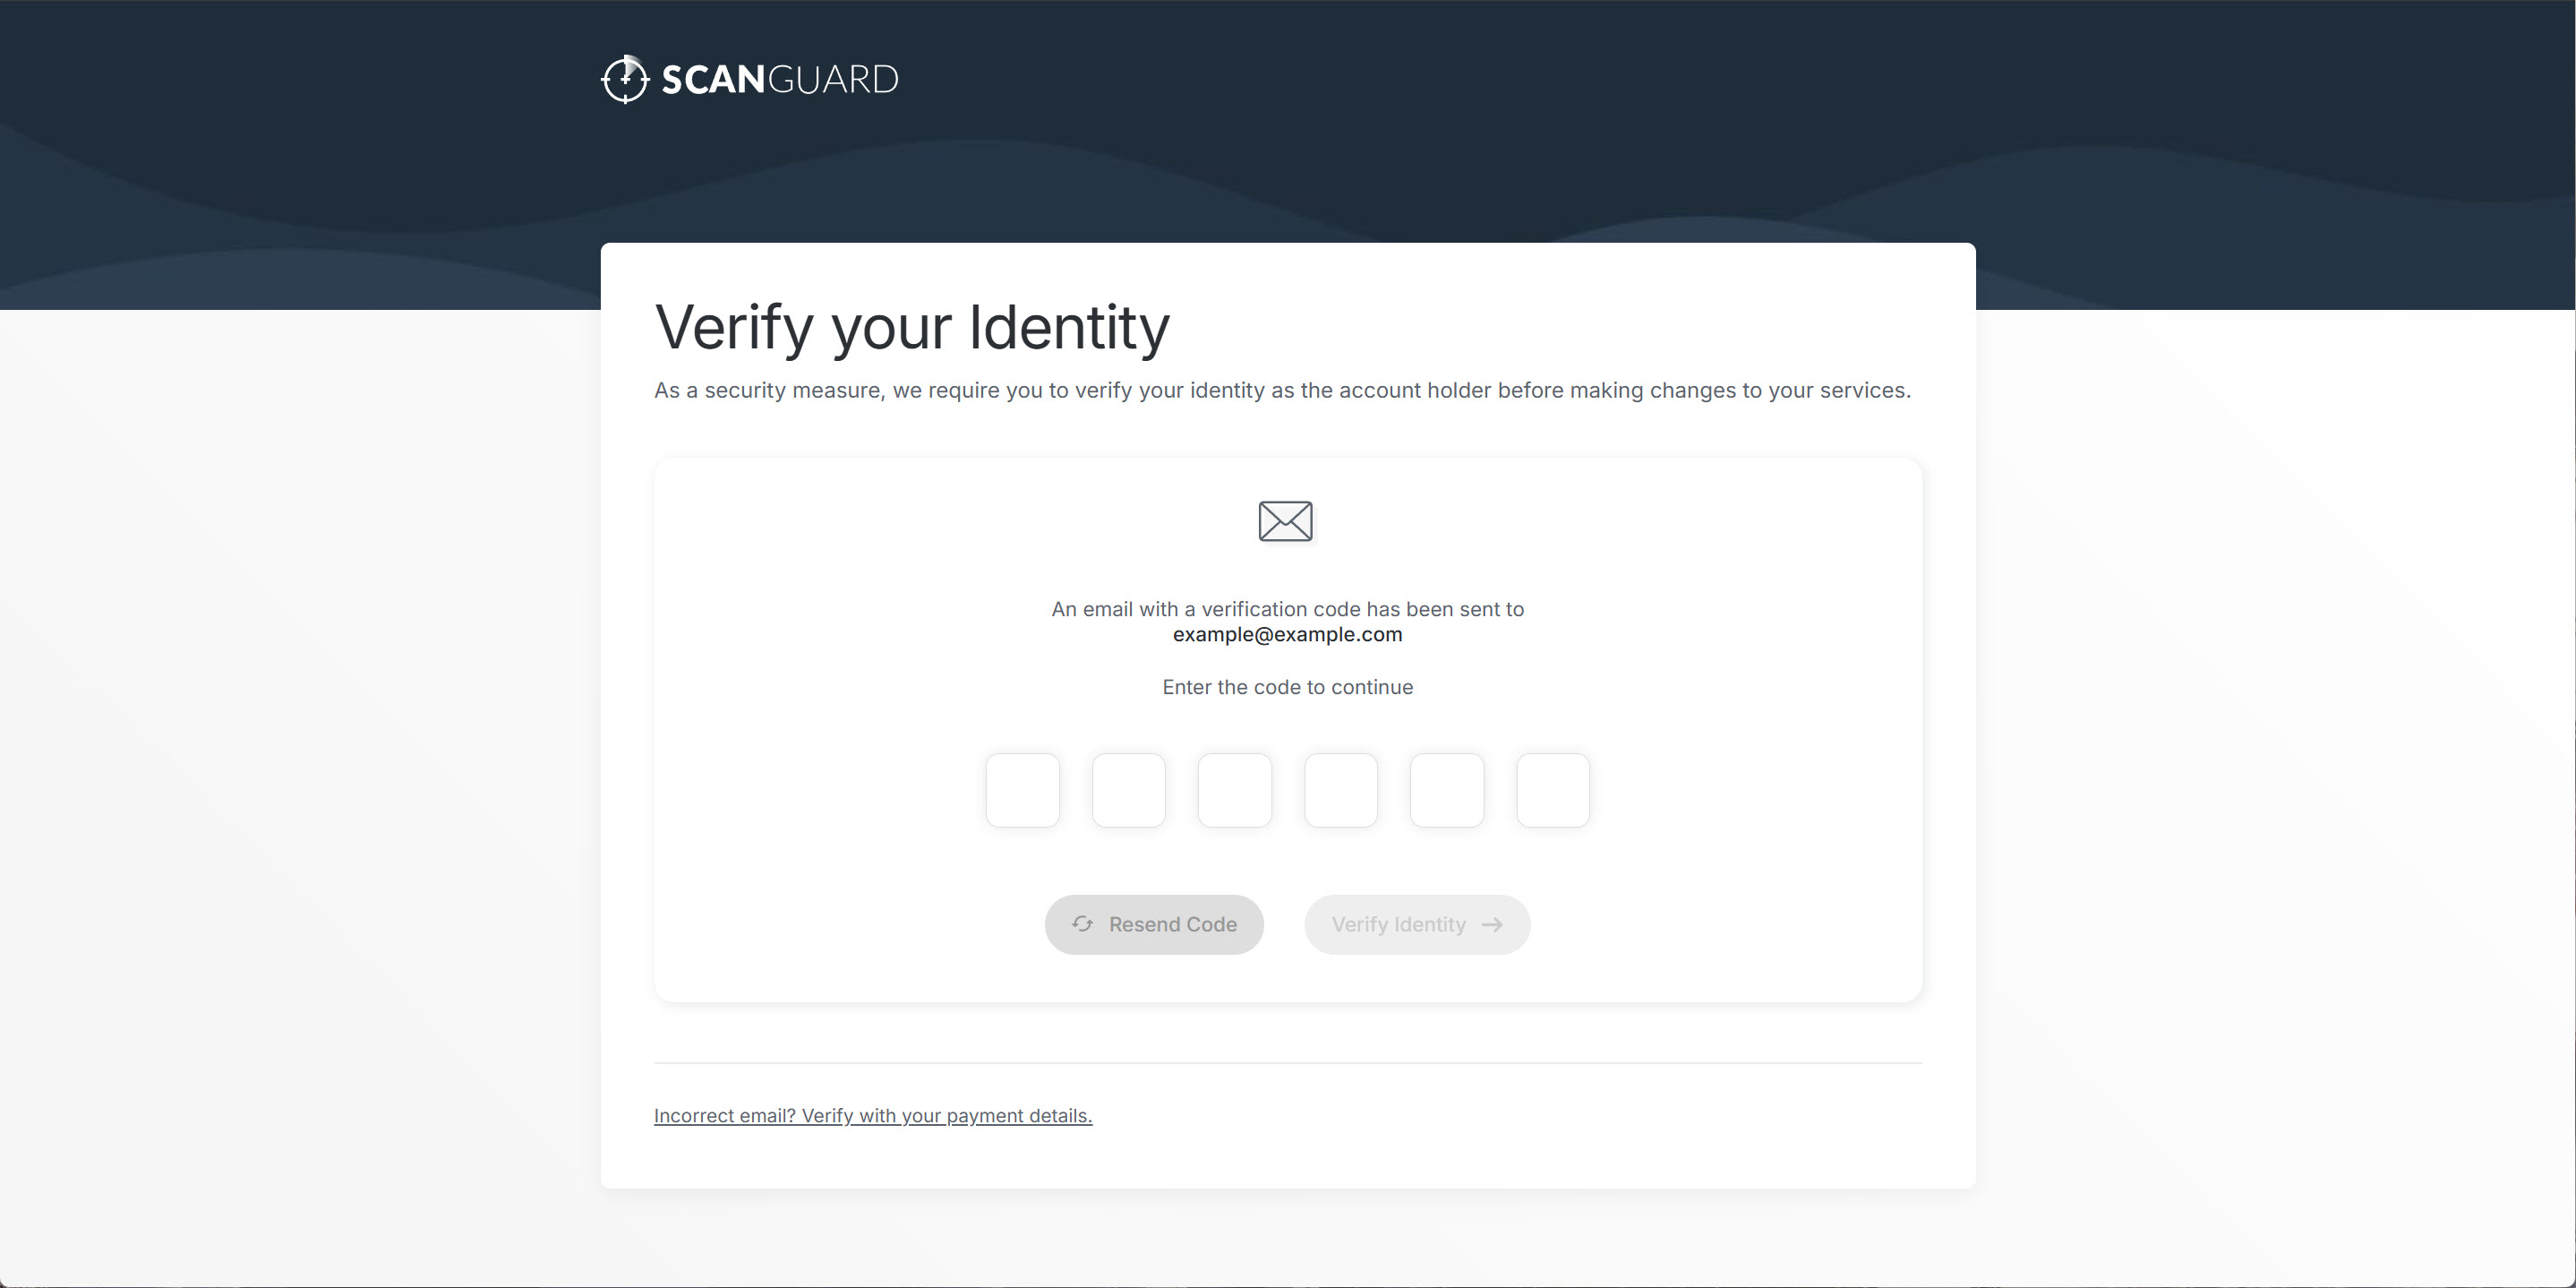
As a security measure, we require you to verify your identity as the account holder before we make any changes to your billing preferences. To facilitate this process, we dispatch a verification code to the email address associated with your account.
To cancel your PCProtect subscriptions you will need to cancel all active subscriptions. To find out how to cancel a subscription please select the payment method below which you used to pay and follow the steps to manage it.
On your iOS® device follow these steps:
Alternatively, to manage your subscription you can review your subscriptions associated with your Apple® Account by clicking here.
To manage your subscription you can review your subscriptions associated with your Google Account by clicking here.
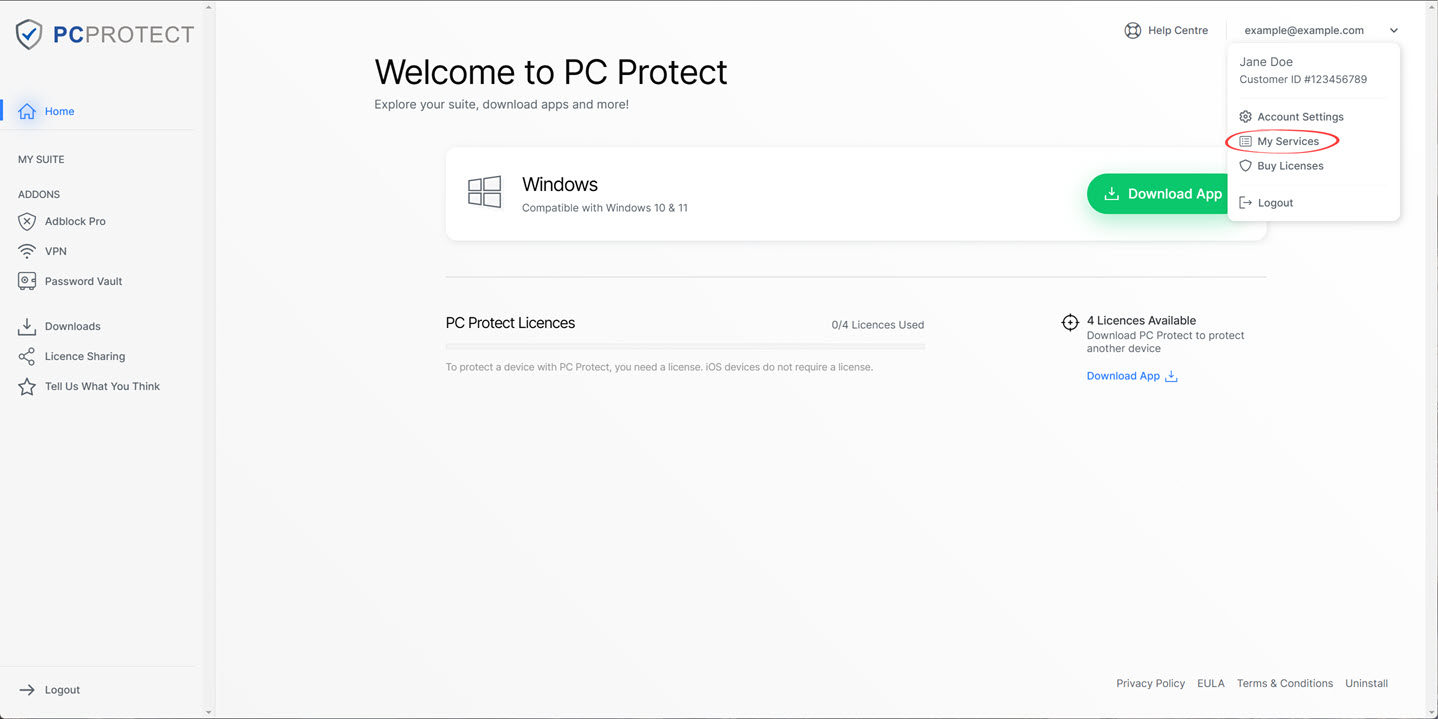
If you wish to cancel a subscription with us, you can do so by clicking here to access your account and navigating to the services menu.
Please see below for an overview of the simple steps.
Login to your account on our website.
On your dashboard click the drop down menu.
In the Menu select 'My Services'
Click 'Cancel Subscription' on your subscription.
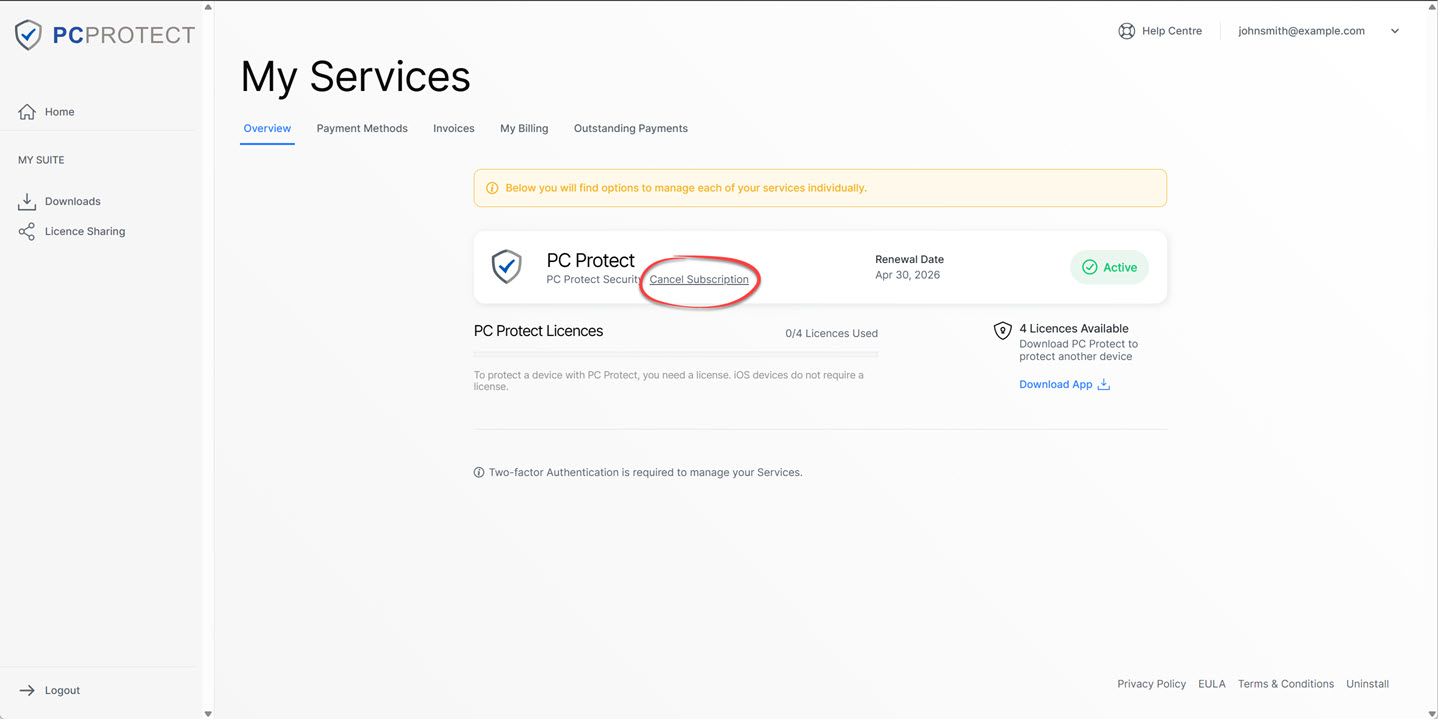
As a security measure, we require you to verify your identity as the account holder before we make any changes to your billing preferences. To facilitate this process, we dispatch a verification code to the email address associated with your account.
If you wish to cancel a subscription with us, you can do so by clicking here to access your account and navigating to the services menu.
Please see below for an overview of the simple steps.
Login to your account on our website.
On your dashboard click the drop down menu.
In the Menu select 'My Services'
Click 'Cancel Subscription' on your subscription.
As a security measure, we require you to verify your identity as the account holder before we make any changes to your billing preferences. To facilitate this process, we dispatch a verification code to the email address associated with your account.